Enquire Now
#

Category: Buying Guides

We Make Luxury Affordable

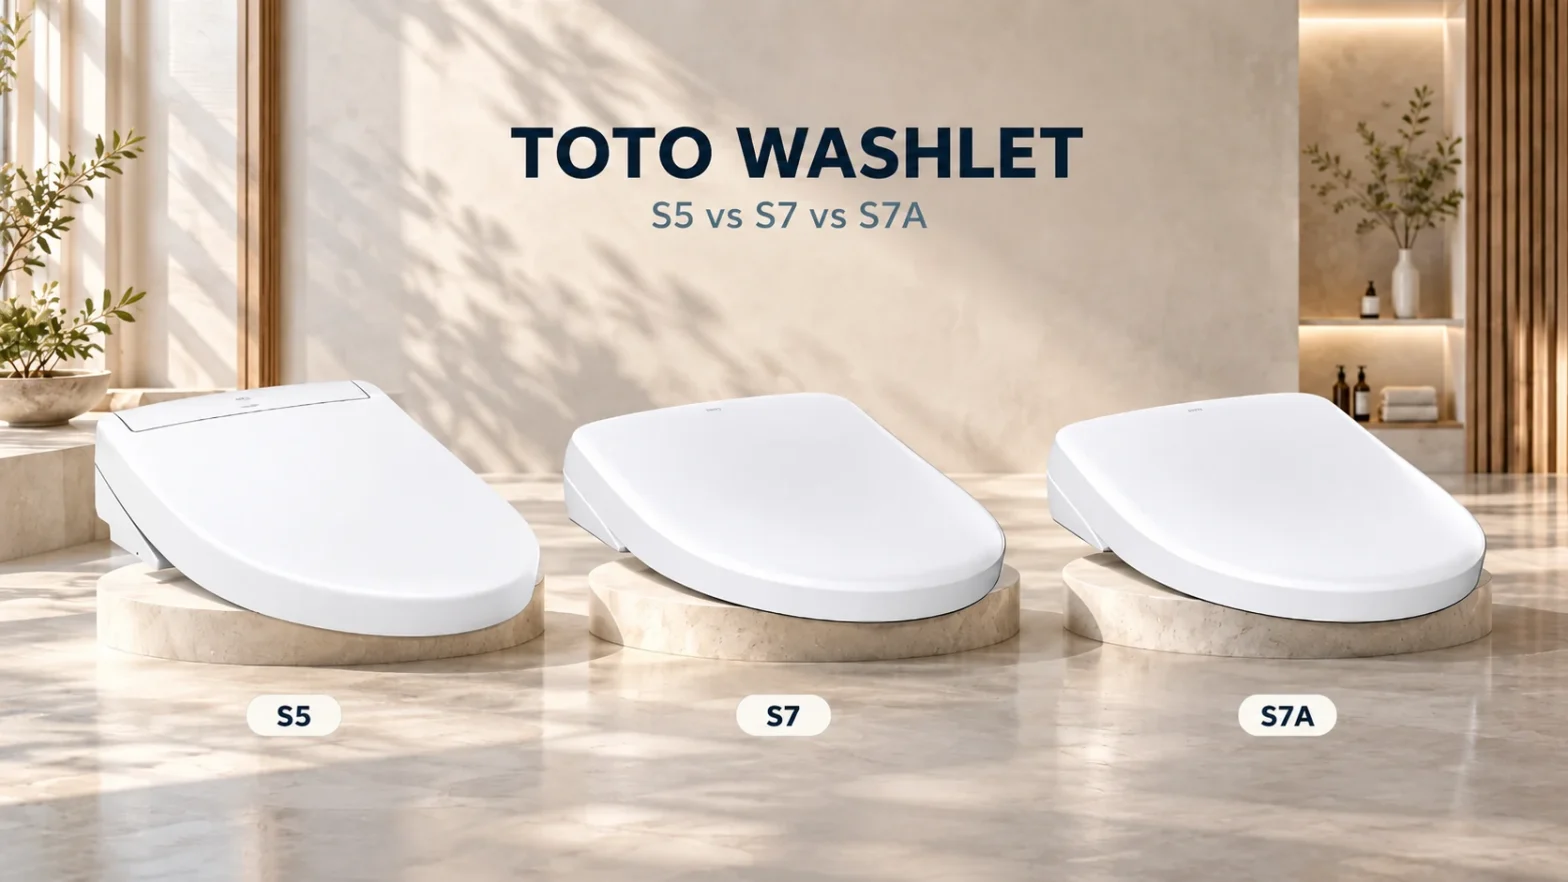
TOTO WASHLET S5 vs S7 vs S7A: Which Bidet Seat Should You Choose?

TOTO WASHLET S5 vs S7 vs S7A: What’s the Real Difference?

TOTO’s S series is the heart of the WASHLET lineup, and the S5, S7 and S7A are the three seats customers ask us about most. At first glance they look almost identical. All three give you endless warm water, a heated seat, a warm air dryer, a deodorizer, EWATER+ and a wireless remote. The differences are in the details: how much you can fine-tune your comfort, how slim each seat sits, how much it automates and how long the warranty runs.

At Bliss Bath and Kitchen, we carry the full TOTO collection, from WASHLET bidet seats to fully integrated NEOREST smart toilets. This guide breaks down the three S-series seats so you can pick the right one for your bathroom without paying for features you won’t use.

Quick Comparison at a Glance

Feature WASHLET S5 WASHLET S7 WASHLET S7A
Model numbers SW3446 (elongated), SW3445 (round) SW4726 (contemporary elongated), SW4724 (classic elongated), SW4725 (round) SW4736 (contemporary elongated), SW4734 (classic elongated), SW4735 (round)
Warm water Instantaneous, endless Instantaneous, endless Instantaneous, endless
Wide Front Cleanse No Yes Yes
Temperature settings (water, seat, dryer) 3 settings 5 settings 5 settings
EWATER+ and PREMIST Yes Yes Yes
Profile Slim (taller at the hinge) Lower-profile design Lower-profile design
Seat sensor Weight-activated seat switch Silent skin-detection sensor Silent skin-detection sensor
Remote Wireless, 4-user memory Multifunction wireless, 4-user memory Multifunction wireless, 4-user memory
Lid SoftClose SoftClose Automatic open/close
Auto flush Not compatible Compatible on select TOTO toilets (kit sold separately) Compatible on select TOTO toilets (kit sold separately)
WASHLET+ compatible Yes Yes Yes
Warranty 1-year limited 2-year limited (residential) 2-year limited (residential)

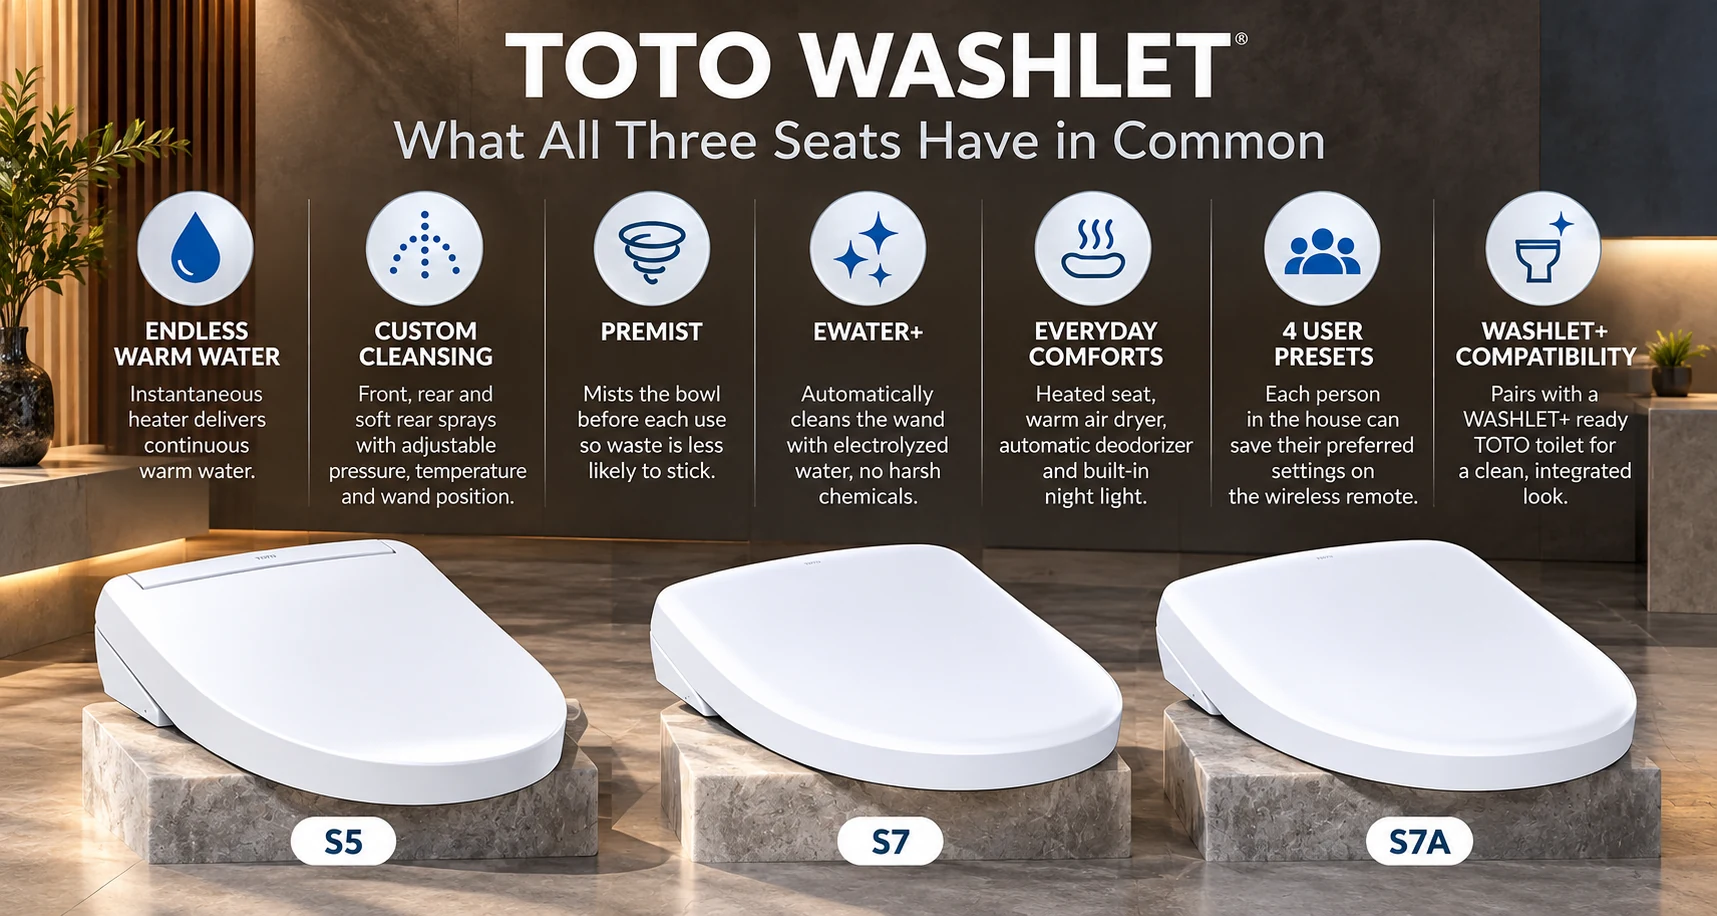
What All Three Seats Have in Common

Before getting into the differences, it helps to know how much you get with any S-series WASHLET. These are all premium bidet seats, and even the S5 is a big step up from a basic model.

TOTO WASHLET S5, S7 and S7A shared features comparison

  • Endless warm water: an instantaneous heater warms water on demand, so it never runs cold, even with back-to-back use.
  • Custom cleansing: front, rear and soft rear sprays, with oscillating and pulsating options and adjustable pressure, temperature and wand position.
  • PREMIST: mists the bowl before each use so waste is less likely to stick.
  • EWATER+: electrolyzed water cleans the wand automatically, with no harsh chemicals.
  • Everyday comforts: a heated seat, warm air dryer, automatic deodorizer and built-in night light.
  • Four user presets: each person in the house can save their preferred settings on the wireless remote.
  • WASHLET+ compatibility: paired with a WASHLET+ ready TOTO toilet, the power cord and water line tuck out of sight.

TOTO WASHLET S5: The Smart Value Pick

The S5 is TOTO’s most accessible remote-controlled S-series seat, and it covers everything most households want from a WASHLET. Its tankless design is noticeably slimmer than the older C5 it replaces, and its rounded corners and streamlined hinge make it easier to wipe down.

Where the S5 saves money is in the finer details. It offers three temperature settings for the water, seat and dryer instead of five, and it doesn’t include Wide Front Cleanse. The seat uses a weight-activated switch in the hinge instead of a skin sensor, and it sits a bit taller at the back. It isn’t compatible with TOTO’s auto flush kit, and it carries a one-year limited warranty. It’s available in both elongated and round versions.

Best for

Guest bathrooms, powder rooms and anyone who wants TOTO quality without the premium price.

TOTO WASHLET S7: The Sweet Spot for Primary Bathrooms

The S7 is where the S series starts to feel truly high-end. The biggest upgrade is comfort control: five temperature settings for the water, seat and dryer let you dial in exactly what you like, and Wide Front Cleanse adds a broader, gentler front spray. EWATER+ keeps the wand and bowl cleaner between uses.

The S7 also looks more refined. Its lower-profile design sits close to the bowl for a nearly integrated appearance, and it comes with TOTO’s multifunction wireless remote. A silent skin-detection sensor replaces the S5’s hinge switch. The S7 can also be paired with TOTO’s optional auto flush kit on select compatible TOTO toilets, and it’s backed by a two-year limited residential warranty. It’s available in contemporary and classic elongated versions, plus a round version. What it doesn’t have is an automatic lid.

Best for

Primary bathrooms and busy family bathrooms, where finer comfort settings, a sleeker look and longer warranty coverage make the biggest difference day to day.

TOTO WASHLET S7A: The Most Automated Option

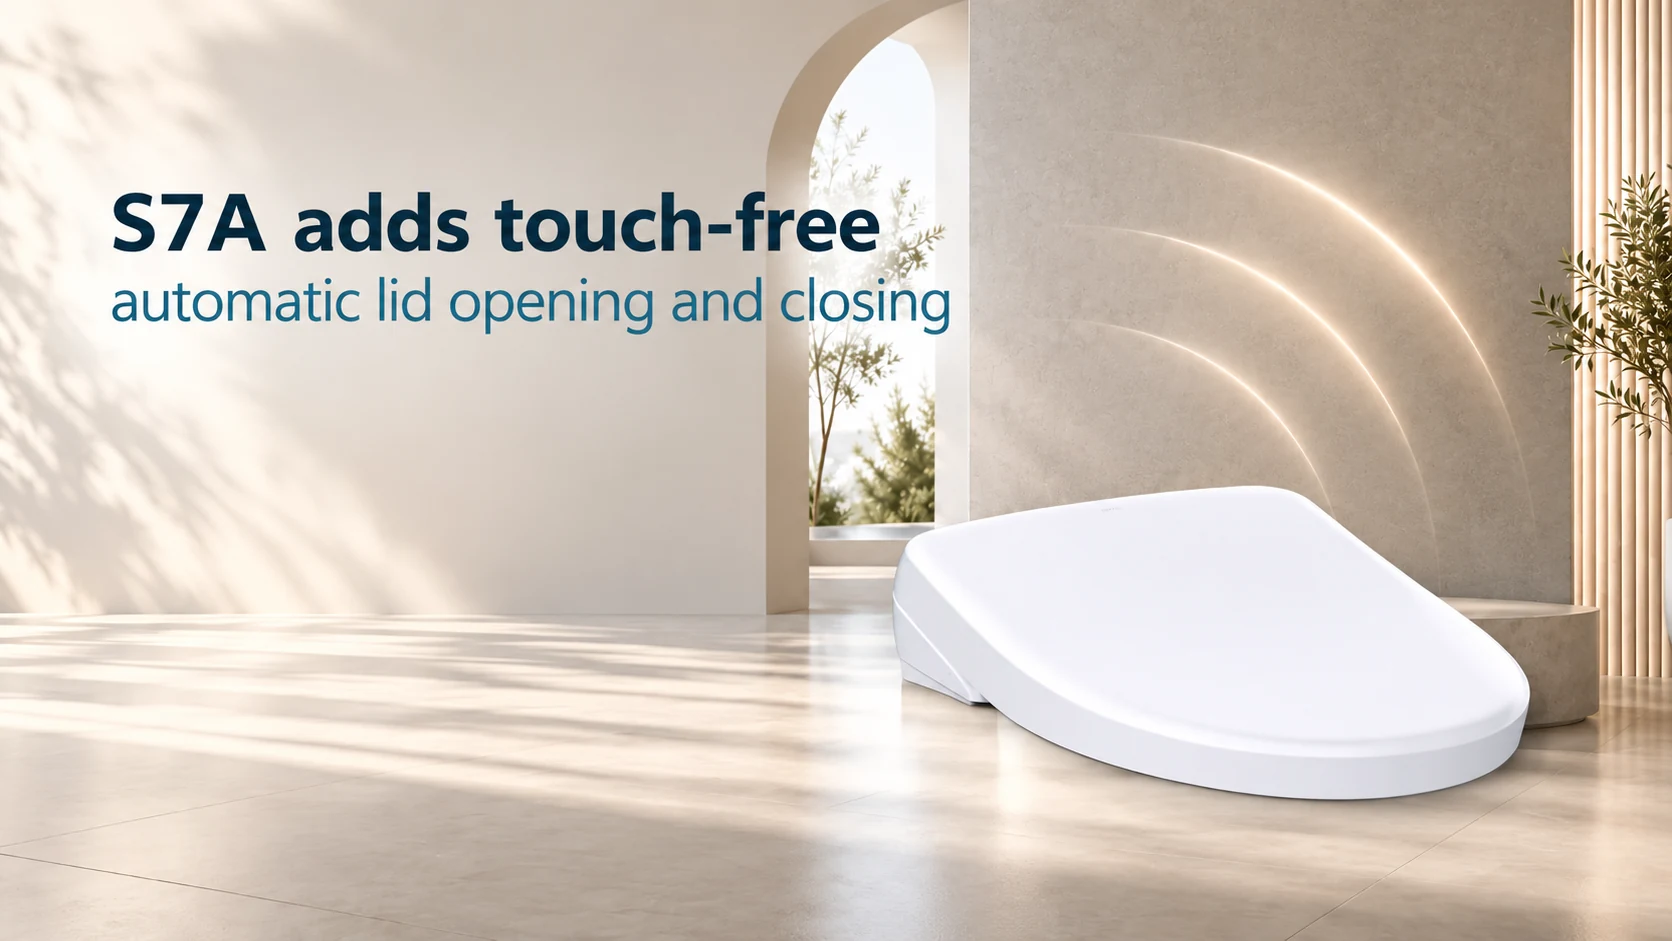
The S7A takes everything the S7 offers and adds TOTO’s automatic open and close lid. The lid lifts as you approach and closes after you leave, reducing the need to touch it. Pair the S7A with a compatible TOTO toilet and optional auto flush kit to add automatic flushing as well.

Like the S7, the S7A has Wide Front Cleanse, five temperature settings, a lower-profile design and a skin-detection sensor. It uses TOTO’s multifunction wireless remote and carries a two-year limited residential warranty. It’s available with TOTO’s flush-fitting contemporary lid or a classic lid in elongated versions, plus a round version.

Best for

Luxury ensuites, anyone who values touch-free convenience, and households with aging-in-place or mobility needs, where not having to bend down to a lid is a real benefit.

TOTO WASHLET S7A with touch-free automatic lid opening and closing

WASHLET+ and Auto Flush: Getting the Cleanest Look

All three seats fit most standard toilets, but pairing them with a WASHLET+ ready TOTO toilet takes the installation up a level. The power cord and water supply hose route through a channel under the seat, so there’s nothing visible hanging off the side of the bowl.

If auto flush is on your wish list, choose the S7 or S7A, pair it with a compatible TOTO toilet, and add the auto flush kit that matches your flush type. The S5 doesn’t support auto flush. If you’d prefer the bidet built right into the toilet, our intelligent and smart toilets collection is worth a look.

Before You Buy: Fit and Installation Tips

  • Measure your bowl: confirm whether your toilet is round or elongated. The S5, S7 and S7A are available for both bowl shapes, but model numbers differ.
  • Check the bowl shape: toilets with a pronounced “French curve” or unusual rim may not be compatible, and some one-piece toilets need verification against TOTO’s compatibility list.
  • Plan for power: every WASHLET needs a grounded GFCI outlet within reach of the cord. If there isn’t one near the toilet, have a licensed electrician add it before installation.
  • Protect the electronics: TOTO recommends a surge protector to guard against power spikes.
  • Think about remote placement: all three remotes mount on the wall and communicate by infrared, so keep a clear line to the seat.

Which TOTO WASHLET Should You Choose?

Choose the S5 if you want TOTO’s core WASHLET experience at the most accessible price. It’s a great fit for a guest bathroom or powder room.

Choose the S7 if the seat is going into your main bathroom. Wide Front Cleanse, five temperature settings, the lower-profile design, the option to add auto flush and a two-year warranty make it the best all-round choice for daily use.

Choose the S7A if you want the most automated option. The automatic lid makes it ideal for a luxury ensuite and genuinely helpful for anyone with limited mobility.

Final Thoughts

There’s no wrong choice in TOTO’s S series. It comes down to how much comfort control and automation you want. The S5 delivers outstanding comfort for the money, the S7 is the smartest upgrade for a primary bathroom, and the S7A is the most automated of the three. Whichever you choose, pairing it with a WASHLET+ ready TOTO toilet gives you the cleanest, most integrated look. If you’re not sure which model fits your toilet, our team is happy to help.

Shop TOTO WASHLET at Bliss Bath and Kitchen, with shipping across Canada.

How to Choose the Right Size Freestanding Tub

A freestanding tub can become the centrepiece of a beautiful bathroom, but choosing the right size takes more than measuring an open space and picking a tub that fits.

The ideal freestanding tub should provide enough room for comfortable bathing while leaving adequate space around the tub for movement, cleaning, fixtures and other bathroom elements. You also need to consider the tub’s overall dimensions, interior bathing area, height, water capacity, plumbing requirements and the proportions of the room.

Whether you’re designing a spacious primary bathroom or working with a more compact space, this freestanding bathtub size guide will help you determine which dimensions make sense for your bathroom.

Quick answer: To choose the right freestanding tub size, measure your available bathroom space first, then compare the tub’s length, width, height, interior bathing dimensions and required clearance. A 60-inch-class tub can work well in many bathrooms, while larger 66-, 70- or 72-inch configurations can provide more generous bathing space when the room allows. The best choice depends on your bathroom layout and how you plan to use the tub.

What Is the Right Size for a Freestanding Tub?

There is no single freestanding tub size that works for every bathroom.

The right size depends on several factors:

  • Available bathroom floor space
  • Tub length and width
  • Tub height
  • Interior bathing dimensions
  • Clearance around the tub
  • Door and walkway locations
  • Number of people using the tub
  • Preferred bathing position
  • Plumbing location
  • Water capacity
  • Overall bathroom design

The important thing is to look beyond the tub’s advertised length.

For example, Bliss’s current freestanding bathtub collection includes compact options such as the Victoria + Albert Kerid at 53″ x 32″, while other models include 60-, 66-, 70-, 71- and 74-inch configurations. That range illustrates why choosing a tub based only on a supposed “standard” size can be misleading.

A properly sized tub should feel comfortable without making the rest of the bathroom feel cramped.

Freestanding Tub Dimensions Explained

When comparing freestanding bathtubs, you’ll typically see three main exterior measurements:

Length × Width × Height

But these measurements don’t tell the entire story.

You should also look at the interior bathing dimensions, water capacity and manufacturer’s installation requirements.

Freestanding Tub Length

Length determines how much floor space the tub occupies from end to end.

It can also influence:

  • Legroom
  • Reclining comfort
  • Overall visual presence
  • Available bathroom circulation
  • Whether the tub works well for one or two bathers

Common residential options include tubs around 60 inches, 66 inches, 70 inches and 72 inches, but the available range is considerably broader.

Bliss’s current collection, for example, includes the BainUltra Evanescence in 59- and 66-inch configurations, BainUltra Lunessa models in 66 and 70 inches, and Victoria + Albert models ranging from compact designs to larger 70- and 71-inch options.

Freestanding Tub Width

Width affects both comfort and the amount of floor space the tub occupies.

A wider tub may provide a more spacious bathing area, but it also requires more room around the outside of the tub.

Don’t judge comfort by exterior width alone. A tub’s shape, wall thickness and interior bathing well can all affect how spacious it feels.

Freestanding Tub Height

Height affects the tub’s visual proportions and can influence how easy it is to enter and exit.

A taller tub isn’t automatically a deeper or more comfortable tub. Compare the actual bathing depth and interior specifications of the model you’re considering.

Height also matters when selecting a tub filler and planning the surrounding bathroom design.

Overall Dimensions vs. Interior Bathing Dimensions

This is one of the most important things to understand when comparing tubs.

Overall dimensions tell you how much physical space the tub occupies.

Interior bathing dimensions tell you more about the space available to the person actually using the tub.

Two tubs with similar exterior dimensions can provide very different bathing experiences because of differences in:

  • Interior width
  • Interior length
  • Sloping backrests
  • Wall thickness
  • Tub shape
  • Bathing depth

Always compare the manufacturer’s detailed specifications rather than relying only on the headline dimensions.

How to Measure Your Bathroom for a Freestanding Tub

Before choosing a model, measure the bathroom carefully.

Step 1: Measure the Available Floor Area

Measure the length and width of the area where you plan to install the tub.

Don’t just measure the empty rectangle where you imagine the tub will sit. Account for nearby:

  • Vanity
  • Toilet
  • Shower
  • Cabinets
  • Doors
  • Windows
  • Radiators or other fixtures

Step 2: Mark the Tub Footprint

A simple trick is to use painter’s tape to mark the approximate length and width of the tub directly on the bathroom floor.

This gives you a much better sense of how much space the tub will actually occupy.

Walk around the marked area and check whether the remaining space feels comfortable.

Step 3: Check Door and Walkway Clearance

Make sure the tub doesn’t interfere with:

  • Bathroom doors
  • Shower doors
  • Vanity doors
  • Cabinet doors
  • Toilet access
  • Main walking paths

A tub can technically fit inside a bathroom and still make the room feel uncomfortable if circulation is restricted.

Step 4: Check Your Plumbing Location

Before selecting a freestanding tub, determine where the drain and water supply will be located.

Depending on the design, you may need a:

  • Floor-mounted tub filler
  • Wall-mounted tub filler
  • Appropriate drain connection
  • Suitable floor plumbing configuration

Bliss offers a range of freestanding tub fillers and floor-mounted tub filler options, making it possible to coordinate the tub and faucet as part of the overall design.

Step 5: Check the Manufacturer’s Installation Specifications

Never rely only on general sizing advice.

Before purchasing a specific tub, check its:

  • Installation guide
  • Required clearances
  • Drain requirements
  • Water capacity
  • Weight
  • Floor requirements
  • Faucet requirements
  • Access requirements

The manufacturer’s specifications should always take priority over generic measurements.

How Much Space Do You Need Around a Freestanding Tub?

The answer depends on the specific tub and bathroom layout.

You need enough space for:

  • Comfortable movement
  • Getting into and out of the tub
  • Cleaning around the tub
  • Accessing nearby fixtures
  • Opening doors and drawers
  • Using the tub filler
  • Maintaining the plumbing

There isn’t one universal clearance number that applies to every freestanding tub installation.

For that reason, don’t simply buy a tub because its dimensions are smaller than the available floor area. Consider the entire footprint of the bathroom and how people will move through it.

A useful test is to mark the proposed tub footprint with tape and physically walk around it before finalizing your selection.

What Size Freestanding Tub Is Best for a Small Bathroom?

A freestanding tub can work in a smaller bathroom, but proportion becomes especially important.

Compact models can help preserve circulation while still creating the visual impact associated with a freestanding bath.

Bliss’s current collection includes compact configurations such as:

  • Victoria + Albert Kerid – 53″ x 32″
  • Victoria + Albert Lussari 1 – 60″ x 28″
  • BainUltra Zenora – 60″ x 30″

These examples show why homeowners shouldn’t assume that every freestanding tub requires a large bathroom.

For a smaller bathroom, prioritize:

  1. Compact exterior dimensions
  2. Efficient tub shape
  3. Adequate bathing depth
  4. Comfortable entry and exit
  5. Clear walking paths
  6. Practical plumbing placement
  7. Easy access for cleaning

The goal isn’t to choose the smallest possible tub.

The goal is to choose the largest tub that fits comfortably without compromising the rest of the bathroom.

What Size Freestanding Tub Is Best for a Large Bathroom?

A larger bathroom gives you considerably more flexibility.

If space allows, you can consider:

  • 66-inch tubs
  • 70-inch tubs
  • 71- or 72-inch tubs
  • Larger configurations
  • Wider soaking tubs
  • Statement-shaped designs

A larger tub can become a visual focal point in a spacious primary bathroom.

For example, Bliss’s collection includes the BainUltra Lunessa 70″ x 38″, Victoria + Albert Toulouse at 71″ x 32″, and BainUltra Libra 74″ x 36″.

However, don’t choose a large tub simply because you have a large room.

Consider whether the extra size provides something meaningful:

  • More comfortable bathing
  • Greater interior space
  • Two-person bathing
  • Greater visual impact
  • Better proportions for the room

One-Person vs. Two-Person Freestanding Tubs

The number of people who will use the tub can significantly affect the ideal size.

Choosing a One-Person Freestanding Tub

For individual bathing, prioritize:

  • Comfortable reclining position
  • Interior length
  • Interior width
  • Backrest angle
  • Bathing depth
  • Ease of entry and exit

A well-designed 60- or 66-inch tub may provide an excellent bathing experience without occupying unnecessary floor space.

Choosing a Two-Person Freestanding Tub

If two people intend to use the tub simultaneously, look beyond exterior length.

Pay particular attention to:

  • Interior width
  • Interior bathing length
  • Dual backrest configuration
  • Drain position
  • Faucet placement
  • Water capacity
  • Hot-water requirements

A larger exterior tub isn’t automatically a two-person tub.

Always check the manufacturer’s specifications to determine how a particular model is designed to be used.

Does Tub Shape Affect the Size You Need?

Yes.

Two tubs with similar overall dimensions can occupy the bathroom differently because of their shape.

Oval Freestanding Tubs

Oval tubs can create a softer, more sculptural appearance and work particularly well in contemporary bathroom designs.

Rectangular Freestanding Tubs

Rectangular designs can create a more architectural look and may work well in bathrooms with strong geometric lines.

Slipper Tubs

Slipper designs feature a raised end that can provide additional back and head support.

Sculptural Freestanding Tubs

Some premium tubs are designed as visual centrepieces as much as functional fixtures.

The important thing is to consider both the physical footprint and visual footprint.

Bliss’s freestanding collection includes a variety of shapes, sizes and styles from brands such as BainUltra, Cheviot, Fleurco, MAAX, Produits Neptune, Victoria + Albert and others.

Freestanding Tub Size and Water Capacity

Exterior dimensions don’t tell you how much water a tub holds.

Water capacity can vary significantly based on:

  • Tub dimensions
  • Interior shape
  • Bathing depth
  • Wall construction
  • Overflow position
  • Interior contours

This matters because a larger soaking tub can require more hot water to reach the desired bathing level.

Before choosing a large tub, check the manufacturer’s water-capacity specifications and consider your home’s hot-water system.

Don’t assume that two tubs with similar exterior dimensions have the same water requirements.

Freestanding Tub Placement Ideas

Once you’ve established the right size, consider where the tub should go.

Tub Against a Wall

Positioning a freestanding tub near a wall can make efficient use of floor space while maintaining the visual appeal of a standalone design.

Tub Near a Window

A tub positioned near a window can create a bright, relaxing bathing environment.

Consider privacy, window construction and moisture exposure when planning this type of layout.

Tub as a Centrepiece

In a larger bathroom, placing the tub prominently in the room can create a dramatic focal point.

This approach works particularly well when the tub has a sculptural silhouette.

Tub Beside a Shower

A tub and shower can work beautifully together, but make sure there is sufficient circulation between the two.

The tub should complement the shower rather than create a bottleneck in the room.

How to Coordinate Your Freestanding Tub With the Bathroom

A freestanding tub should not be selected in isolation.

Think about how it works with:

  • Vanity
  • Bathroom sink
  • Shower
  • Tub filler
  • Faucets
  • Lighting
  • Mirrors
  • Flooring
  • Wall finishes
  • Storage

The finish and silhouette of the tub can influence the character of the entire bathroom.

For example, a sculptural contemporary tub can become a focal point in a minimalist bathroom, while a classic freestanding or clawfoot design can complement a more traditional space.

This is where choosing from a broad collection becomes useful. Instead of designing the room around whichever tub happens to fit, you can compare different sizes, shapes and styles and select the one that best suits the overall design.

Freestanding Tub Materials and Why They Matter

The material of a freestanding tub can affect more than appearance.

Depending on the product, materials can influence:

  • Weight
  • Durability
  • Heat retention
  • Surface finish
  • Cleaning requirements
  • Installation considerations

Bliss’s bathtub collection includes products made from different materials and construction types, including acrylic and other premium tub materials, as well as cast iron options.

When comparing materials, consider the complete product specification rather than assuming one material is automatically best.

What to Check Before Buying a Freestanding Tub

Use this checklist before placing your order:

  • Measure the available bathroom floor space
  • Check the tub’s overall length
  • Check the tub’s overall width
  • Check the tub’s height
  • Compare interior bathing dimensions
  • Confirm required clearance
  • Check door and walkway clearance
  • Confirm drain location
  • Plan the tub filler
  • Check water capacity
  • Consider hot-water requirements
  • Check floor and installation requirements
  • Confirm the tub’s weight
  • Review the manufacturer’s installation guide
  • Consider how the tub works with the rest of your bathroom

If all of these factors work together, you’re much more likely to end up with a tub that feels right both physically and visually.

Common Freestanding Tub Sizing Mistakes

Choosing the Tub Before Measuring the Bathroom

This is one of the easiest mistakes to avoid.

Measure the room first. Shop second.

Looking Only at Tub Length

Length is important, but width, height and interior bathing dimensions matter too.

Ignoring the Interior Bathing Area

A large exterior doesn’t necessarily mean a spacious bathing experience.

Forgetting About Clearance

A tub that fits tightly into a room can make the entire bathroom feel smaller.

Ignoring Doors and Drawers

Check the movement of bathroom doors, shower doors, vanity doors and cabinets.

Forgetting Plumbing

The drain and tub filler need to be planned before installation.

Assuming Bigger Is Always Better

A larger tub may offer more bathing space, but it also requires more floor space and potentially more water.

Choosing Based Only on Appearance

A beautiful tub should also be comfortable, practical and appropriate for the room.

Not Checking the Manufacturer’s Specifications

Generic measurements are useful for planning, but the specific product documentation should determine the final installation.

Planning a Bathroom Renovation Around a Freestanding Tub

If you’re installing a freestanding tub as part of a larger renovation, sizing should be considered at the beginning of the design process.

The tub affects:

  • Plumbing
  • Flooring
  • Vanity placement
  • Shower location
  • Lighting
  • Electrical planning
  • Bathroom circulation
  • Faucet placement
  • Storage

Instead of choosing the tub after everything else has been finalized, consider selecting the major fixtures early and designing the bathroom around their actual dimensions.

For a larger renovation, working with bathroom renovation professionals can help coordinate the tub with the rest of the space and ensure that plumbing, layout and installation requirements are considered before construction begins.

Why Choose a Freestanding Tub From Bliss Bath and Kitchen?

Once you’ve established the dimensions that work for your bathroom, the next step is finding a tub that delivers the right combination of size, comfort, design and quality.

Bliss Bath and Kitchen offers a broad selection of freestanding bathtubs from established brands, giving homeowners the flexibility to compare different dimensions, shapes, materials and styles in one collection. The current selection includes brands such as BainUltra, Cheviot Products, Duravit, Fleurco, MAAX, Produits Neptune, Victoria + Albert and Zitta.

That range is particularly valuable when size is the primary consideration.

Instead of choosing a tub simply because it is available in one standard configuration, you can compare compact models for smaller bathrooms with larger statement tubs designed for more spacious rooms.

The collection currently includes examples such as the 53-inch Victoria + Albert Kerid, 60-inch models, 66-inch BainUltra and Victoria + Albert options, 70-inch BainUltra and Victoria + Albert designs, and larger 71- and 74-inch configurations.

Bliss also offers a wider selection of bathtub styles, including freestanding, cast iron, clawfoot, corner, Japanese soaking, non-standard and walk-in tubs. That means you can compare bathtub options if your bathroom layout ultimately calls for a different configuration.

For homeowners creating a complete bathroom, Bliss’s broader collection extends beyond tubs to faucets, shower systems, vanities, toilets, sinks, LED mirrors and bath accessories. This makes it easier to coordinate the major elements of the room around the tub you’ve selected.

Final Verdict: Choosing the Right Freestanding Tub Size

Choosing the right freestanding tub size comes down to one principle:

Don’t choose the tub first and try to make the bathroom fit around it. Measure the bathroom, understand your needs and then choose the tub that fits both.

For a small bathroom, prioritize a compact footprint, comfortable clearance and efficient proportions.

For a standard primary bathroom, balance exterior dimensions with interior bathing space and the placement of surrounding fixtures.

For a large bathroom, a 66-, 70-, 71- or larger tub can create an impressive focal point when the room can comfortably accommodate it.

For two-person bathing, pay particular attention to interior width, bathing well dimensions, backrest configuration and water capacity rather than looking only at overall length.

And when you’re ready to compare products, explore Bliss Bath and Kitchen’s freestanding bathtub collection to find a size, shape and style that works with your bathroom.

A well-chosen freestanding tub should do more than fit the room. It should make the room feel more comfortable, more cohesive and more enjoyable to use.

Cooktop Buying Guide: 10 Things to Check Before You Buy

Choosing a cooktop is about more than deciding between gas and induction. The right cooktop should match the way you cook, the size and layout of your kitchen, your countertop, available utilities, ventilation requirements and the features you will actually use.

Whether you’re planning a complete kitchen renovation or replacing an existing appliance, this cooktop buying guide walks you through the most important things to consider before making your decision. From cooktop types and sizes to cooking zones, installation and safety features, you’ll know exactly what to look for when buying a cooktop.

Quick answer: The best cooktop is the one that fits your cooking style, kitchen layout and installation requirements. Gas cooktops offer familiar flame control, induction provides fast and precise cooking with a sleek surface, and electric cooktops can be a practical choice for many kitchens. For a truly seamless kitchen design, specialty under-counter induction solutions offer another option worth considering.

Cooktop Types Explained

Before comparing brands, sizes or features, start by understanding the main cooktop types. Each technology offers a different combination of cooking performance, convenience, appearance and installation requirements.

Gas Cooktops

Gas cooktops remain a popular choice for cooks who enjoy direct, visible flame and immediate control over heat. Turning the burner up or down provides an intuitive way to adjust cooking temperatures, making gas especially appealing for people who frequently sauté, sear, simmer or cook with traditional techniques.

When choosing a gas cooktop, consider the number of burners, burner arrangement, heat output, simmer capability, grate design and ease of cleaning.

A well-designed gas cooktop can also give a kitchen a professional, chef-inspired appearance.

Induction Cooktops

Induction cooktops use electromagnetic technology to heat compatible cookware directly. This makes them an attractive option for modern kitchens where speed, precise control, easy cleaning and a streamlined appearance are priorities.

The smooth cooking surface is particularly convenient because there are fewer recessed areas around which food and spills can collect. Many induction models also offer useful features such as power-boost functions, timers, pan detection and flexible cooking zones, although available features vary by model.

If you’re considering induction, remember to check whether your cookware is compatible before purchasing.

Electric Cooktops

Electric cooktops use electrically heated elements beneath the cooking surface. They can be a straightforward option for homeowners who prefer an electric cooking appliance and don’t require the specific characteristics of gas or induction.

Modern electric cooktops can offer smooth surfaces, multiple heat settings and easy-to-use controls. As with any appliance, compare individual models rather than assuming every electric cooktop offers the same performance or features.

Invisible and Under-Counter Induction Cooktops

Kitchen design is increasingly moving toward cleaner, more integrated spaces. Specialty induction technology takes that idea further by placing the cooking technology beneath a compatible countertop, allowing the surface to maintain a more seamless appearance when the cooktop is not in use.

For homeowners interested in this approach, an innovative invisible cooktop can create a particularly minimalist look while bringing induction cooking into the countertop itself.

This type of solution requires careful planning because countertop compatibility, installation and product specifications are important considerations.

10 Things to Check Before Buying a Cooktop

Once you’ve decided which cooktop types interest you, evaluate the following ten factors before choosing a model.

1. Choose the Right Cooktop Type for Your Cooking Style

Start with how you actually cook.

If you enjoy cooking over a visible flame and want immediate visual feedback when adjusting heat, gas may be a natural fit.

If you value fast heating, precise control, a streamlined appearance and easy surface cleaning, induction may be particularly appealing.

If you prefer a straightforward electric cooking surface, an electric cooktop may suit your needs.

There isn’t one cooktop type that is universally best for every kitchen. The right choice depends on your priorities.

2. Measure Your Available Space

Cooktops are available in several widths, with 30-inch and 36-inch configurations being common choices for residential kitchens. Larger configurations can make sense for homeowners who frequently cook multiple dishes at once and have sufficient counter and cabinet space.

However, don’t choose a cooktop based solely on its advertised width.

Before ordering, check:

  • Overall cooktop dimensions
  • Countertop cutout dimensions
  • Cabinet dimensions
  • Required clearances
  • Location of electrical or gas connections
  • Manufacturer installation requirements

One important distinction is that the cooktop’s overall dimensions and the countertop cutout dimensions are not necessarily the same.

Always use the manufacturer’s installation documentation when preparing your kitchen.

3. Consider How Many Burners or Cooking Zones You Need

More burners aren’t automatically better.

Think about the way you normally prepare meals. If you frequently use several pots and pans simultaneously, a larger cooktop with more cooking zones may make everyday cooking considerably more convenient.

Also consider the arrangement of those zones.

A cooktop with four burners can be more useful than one with five if the cooking zones are better positioned for the cookware you actually use.

For induction cooktops, look for configurations that accommodate different pan sizes and, where available, bridge or flexible zones that can combine cooking areas for larger cookware.

4. Look at Heat Output and Power

For gas cooktops, burner output is commonly expressed in BTUs. Rather than choosing the highest number available, look for a useful combination of high-output burners and lower-output options for simmering.

A good configuration can give you flexibility for everything from quickly heating a large pot to gently simmering a sauce.

For induction and electric cooktops, pay attention to wattage, power levels and features such as boost functions.

The goal isn’t simply maximum power. It’s having enough power and control for the cooking you actually do.

5. Check Installation Requirements Before You Buy

Installation should be considered before you order your cooktop, not after it arrives.

Depending on the cooktop type and model, you may need to plan for:

  • A suitable gas connection
  • Appropriate electrical capacity
  • Countertop cutout dimensions
  • Cabinet clearance
  • Ventilation
  • Heat clearances
  • Compatible countertop materials
  • Access for installation and servicing

For a major renovation, appliance placement should be considered alongside cabinetry, countertops, ventilation and the rest of the kitchen layout.

Working with professionals experienced in professional kitchen design and renovation can help you coordinate these details before installation.

Always follow the manufacturer’s installation instructions and applicable local building and electrical requirements.

6. Don’t Overlook Ventilation

A cooktop and range hood should be considered together.

Cooking produces heat, steam, smoke, grease and odors, so appropriate ventilation can make a significant difference to the comfort of your kitchen.

Gas cooking in particular requires careful attention to ventilation, while any cooktop can benefit from a thoughtfully planned ventilation system.

When planning your kitchen, consider:

  • Range hood size
  • Hood placement
  • Ventilation capacity
  • Ducted versus recirculating configurations
  • Clearance above the cooktop
  • Manufacturer recommendations

The ideal ventilation solution depends on the cooktop, kitchen layout and installation conditions.

7. Consider How Easy the Cooktop Is to Clean

A beautiful cooktop should also be practical for everyday use.

Gas cooktops generally require cleaning around burners, caps and grates. Smooth-surface electric and induction cooktops have fewer recessed components, which can make routine wipe-downs simpler.

Induction is particularly appealing to homeowners who want a clean, minimalist cooking surface.

Regardless of the type you choose, follow the manufacturer’s cleaning recommendations and use products appropriate for the cooking surface.

8. Look for the Safety Features That Matter to You

Modern cooktops can offer a variety of safety features, although the exact features depend on the model.

Depending on the appliance, these can include:

  • Automatic shutoff
  • Child or control locks
  • Residual heat indicators
  • Pan detection
  • Overheat protection
  • Flame-failure protection on gas models

Don’t assume that every cooktop has every feature. Check the specifications of the exact model you’re considering.

9. Check Cookware Compatibility

Cookware compatibility is especially important when choosing induction.

Induction cooktops require compatible cookware because the cooking process relies on magnetic interaction between the cookware and the induction system.

If you’re unsure whether your existing pots and pans will work, check their specifications or perform a manufacturer’s recommended compatibility test.

You should also consider cookware diameter. The cooking zone and pan size should work well together for the type of cooking you normally do.

10. Choose Features You’ll Actually Use

Premium cooktops can offer a wide range of features. The best approach is to focus on the features that improve your everyday cooking rather than simply choosing the longest feature list.

Potentially useful features include:

  • Power boost
  • Bridge or flexible cooking zones
  • Precise temperature control
  • Timers
  • Pan detection
  • Automatic shutoff
  • Simmer settings
  • Touch controls
  • Smart connectivity
  • Specialty cooking modes

Think about your cooking habits before paying extra for advanced functions.

A cooktop is a better investment when its features solve real problems in your kitchen.


Gas vs. Induction vs. Electric Cooktops

Still deciding between the major cooktop types? Here’s a quick comparison.

Feature Gas Induction Electric
Heat control Excellent Excellent Good
Heating response Fast Very fast Moderate
Visible flame Yes No No
Surface cleaning More involved Easy Relatively easy
Cookware requirements Broad compatibility Compatible cookware required Broad compatibility
Design Traditional/pro-style Sleek and modern Versatile
Installation Gas and ventilation considerations Electrical requirements Electrical requirements
Best suited to Traditional and high-heat cooking Fast, precise, modern cooking Straightforward everyday cooking

Which Cooktop Is Best for You?

Choose gas if you prefer traditional cooking, visible flames and direct heat adjustment.

Choose induction if you prioritize speed, precision, easy cleanup and a contemporary kitchen aesthetic.

Choose electric if you want an electric cooking surface with straightforward everyday functionality.

Consider an invisible induction solution if creating a seamless countertop and minimalist kitchen design is a major priority.

What Size Cooktop Should You Choose?

Cooktop size should balance cooking capacity with the available space in your kitchen.

30-Inch Cooktops

A 30-inch cooktop can be an excellent option for kitchens where counter space is limited or where a compact configuration provides enough cooking capacity.

It can also leave more workspace available for food preparation.

36-Inch Cooktops

A 36-inch cooktop provides additional room for larger cookware and multiple dishes.

For homeowners who cook frequently or regularly prepare several dishes simultaneously, the additional cooking area can make the larger footprint worthwhile.

Larger Cooktops

Larger configurations can be attractive for expansive kitchens and serious home cooks who want maximum cooking flexibility.

However, larger isn’t always better. Make sure the additional cooking surface justifies the counter space it occupies and works with the rest of your kitchen layout.

Cooktop Features Worth Paying For

When investing in a premium kitchen appliance, prioritize features that improve your cooking experience.

High-value features

Look closely at:

  • Precise heat control
  • Powerful burners or cooking zones
  • Flexible or bridge zones
  • Easy-to-clean surfaces
  • Pan detection
  • Safety shutoff
  • Useful timer functions
  • Well-designed controls

Lifestyle-dependent features

Other features may be valuable depending on how you use your kitchen:

  • Wi-Fi connectivity
  • App controls
  • Smart-home integration
  • Specialty cooking programs
  • Additional temperature settings

A premium cooktop doesn’t have to be the one with the most features. It should be the one with the right combination of performance, design, functionality and convenience for your kitchen.

Cooktop Installation: What to Know Before Ordering

A cooktop is a built-in appliance, so planning ahead is essential.

Before placing an order, confirm:

  1. The available countertop space
  2. The manufacturer’s cutout dimensions
  3. Cabinet dimensions and clearances
  4. Electrical requirements
  5. Gas requirements, if applicable
  6. Ventilation requirements
  7. Countertop compatibility
  8. Required clearances
  9. Installation access
  10. Local code requirements

For a renovation, it is much easier to solve these issues during the kitchen design stage than after countertops and cabinets have already been installed.

That’s one reason choosing your appliances early can be an important part of the overall kitchen-planning process.

Common Cooktop Buying Mistakes to Avoid

Choosing a Cooktop Based Only on Appearance

A cooktop can look beautiful in a showroom but still be the wrong choice for your cooking style.

Consider performance and functionality alongside aesthetics.

Choosing the Wrong Size

Don’t assume a larger cooktop is automatically better. Make sure the size works with your kitchen layout and leaves enough preparation space.

Ignoring the Countertop Cutout

Always distinguish between the appliance’s overall dimensions and its required cutout.

Forgetting About Ventilation

Ventilation should be planned alongside the cooktop rather than treated as an afterthought.

Not Checking Induction Cookware Compatibility

If you’re switching to induction, make sure your cookware will work with the technology.

Choosing Too Many Burners

Additional burners are only useful if you have enough space and regularly use them.

Ignoring Electrical or Gas Requirements

Confirm utility requirements before purchasing the appliance.

Paying for Features You Won’t Use

Premium appliances can offer impressive technology, but the best investment is one that improves your everyday cooking experience.

Cooktop Buying Checklist

Before choosing your cooktop, ask yourself:

  • Which cooktop type best suits my cooking style?
  • What size cooktop fits my kitchen?
  • How many burners or cooking zones do I need?
  • Do I have the required gas or electrical supply?
  • What ventilation will I need?
  • Is my existing cookware compatible?
  • How easy will the cooktop be to clean?
  • Which safety features are important to me?
  • Which advanced features will I actually use?
  • Does the cooktop complement my overall kitchen design?
  • Have I checked the manufacturer’s installation requirements?

If you can answer these questions, you’ll be in a much stronger position to choose a cooktop that works for both your kitchen and your cooking habits.

Why Choose Bliss Bath & Kitchen for Your Cooktop?

Choosing a cooktop is an important part of creating a kitchen that feels as good to use as it looks.

At Bliss Bath & Kitchen, the focus is on bringing quality, design and functionality together through a curated range of kitchen products and appliances. The current kitchen-appliance collection includes premium brands such as Café Appliances, GE, ILVE, Invisacook, Samsung and SMEG, with cooktops among the categories available.

That range gives homeowners more choice when comparing different cooking technologies, configurations and design approaches.

Bliss also positions its appliance collection around high-end and luxury kitchen appliances, making it possible to coordinate the cooktop with other major kitchen appliances rather than treating it as an isolated purchase.

Whether you’re designing a modern kitchen around induction, looking for the character and control of gas cooking, or exploring innovative solutions such as invisible induction, choosing the appliance as part of the overall kitchen design can help create a more cohesive result.

Explore the full selection of kitchen appliances from Bliss Bath & Kitchen to compare options for your kitchen.

Final Verdict: How to Choose the Right Cooktop

The best cooktop isn’t necessarily the most expensive or the one with the longest list of features. It’s the one that fits your cooking style, kitchen space, installation requirements and design goals.

Choose gas if you love direct flame control and traditional cooking.

Choose induction if you want fast, precise cooking with a sleek, easy-to-clean surface.

Choose electric if a straightforward electric cooking surface best suits your kitchen.

And if creating a seamless, minimalist countertop is part of your vision, explore invisible induction technology as an innovative alternative.

Most importantly, consider the cooktop together with your countertops, cabinetry, ventilation and other appliances. A well-planned kitchen is one where every component works together.

With a curated selection of premium kitchen appliances and established brands, Bliss Bath & Kitchen can help you find a cooktop that combines performance, functionality and design for the kitchen you’re creating.

Thermostatic vs Standard Shower Systems: What’s the Difference?

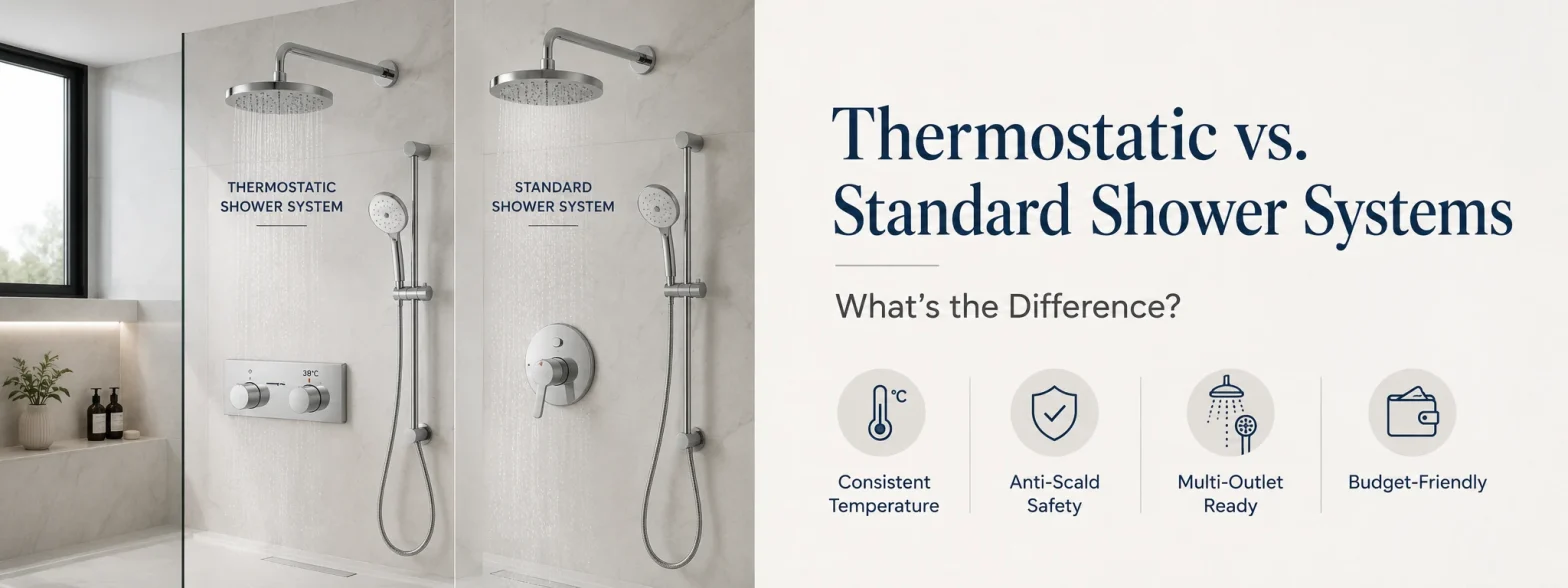
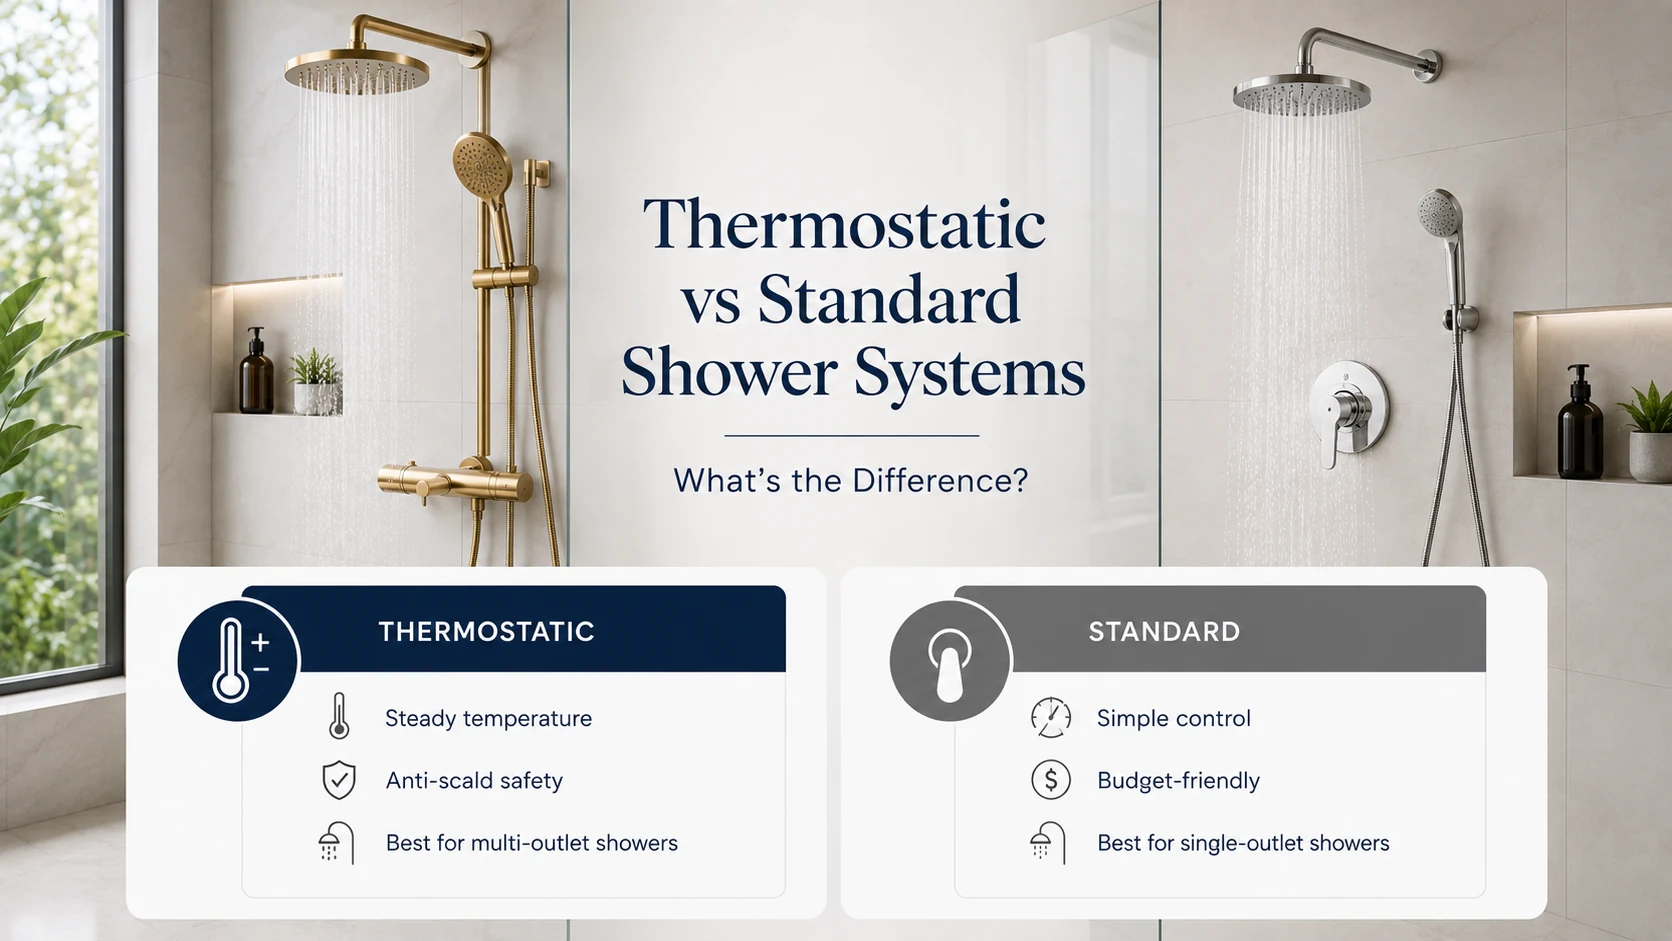
Side-by-side thermostatic and standard shower system panels in a modern bathroom

Thermostatic vs Standard Shower Systems: What’s the Difference?

If you’ve ever had your shower suddenly run scalding hot because someone flushed a toilet elsewhere in the house, you already understand the appeal of a thermostatic shower system. But is the upgrade worth it over a standard shower valve? The answer depends on how much you value consistent temperature control versus a simpler, more budget-friendly setup.

At Bliss Bath and Kitchen, we carry both thermostatic and standard shower systems from brands like Riobel, Grohe, and Tenzo. Here’s how the two types actually differ.

Quick Comparison at a Glance

Feature Thermostatic Shower System Standard Shower System
Temperature control Maintains a set, consistent temperature automatically Manual — adjusts with a single lever or knob
Protection from pressure changes Yes, compensates automatically No, temperature can fluctuate
Number of controls Separate temperature and volume controls Single control for both
Safety Built-in anti-scald protection Depends on the valve’s pressure-balance rating
Cost Higher, more complex valve Lower, simpler mechanism
Best for Multi-outlet showers, households with kids or elderly users Simple single-outlet showers, budget renovations

How Thermostatic Shower Systems Work

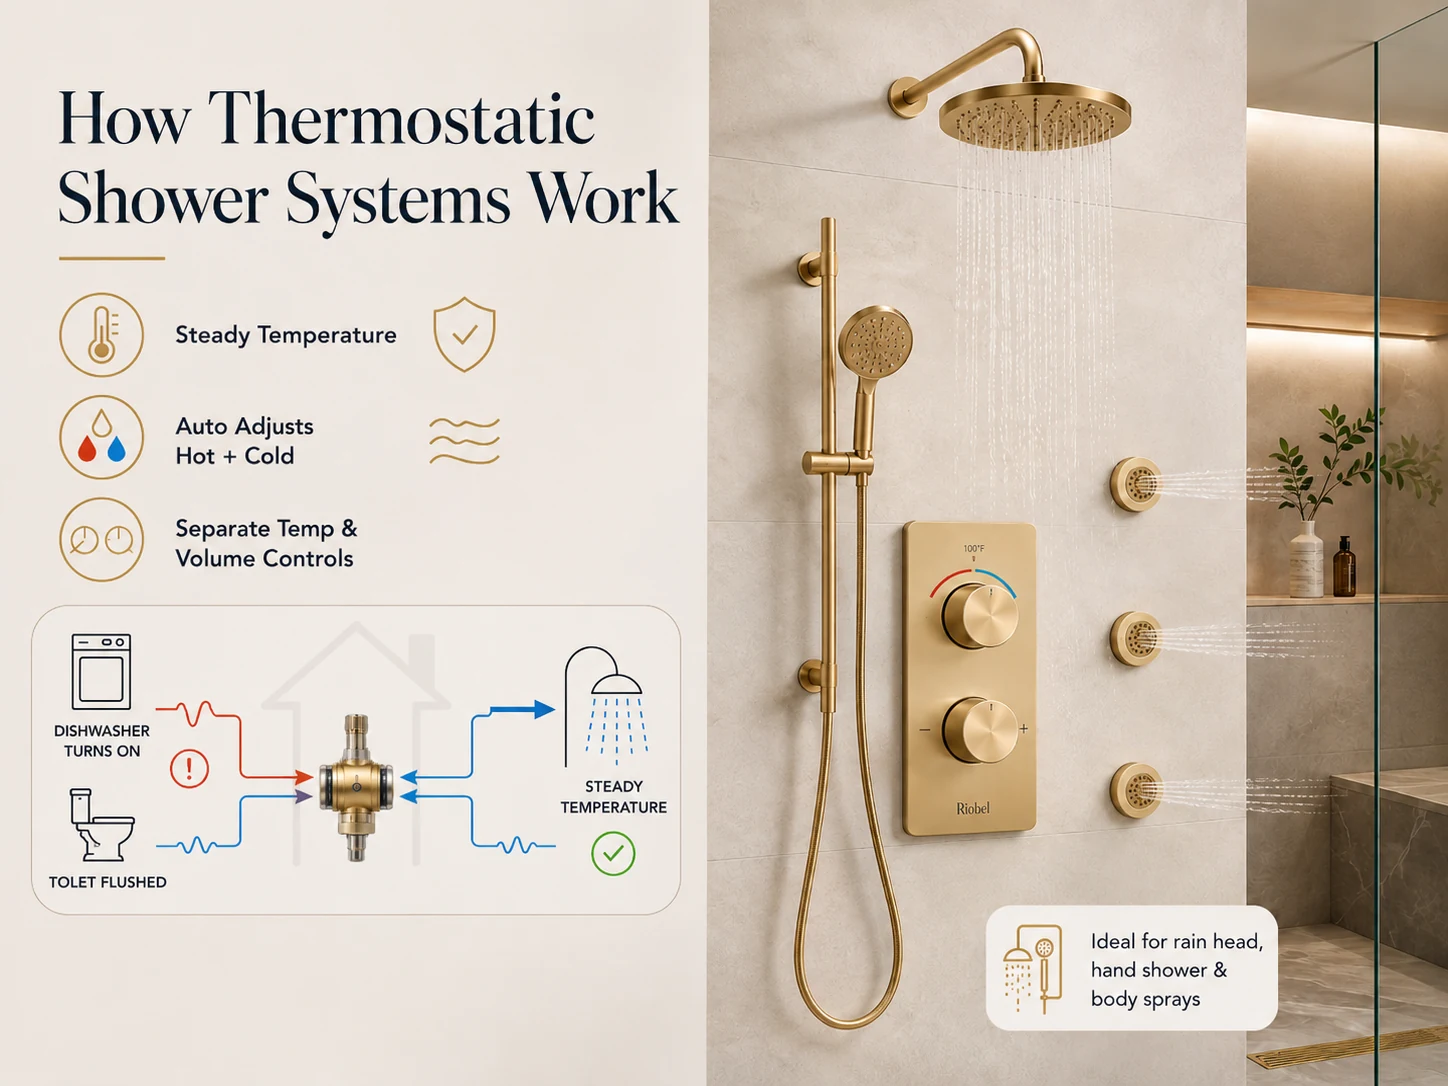
How thermostatic shower systems work to maintain consistent water temperature

A thermostatic valve uses an internal element that constantly monitors incoming water temperature and adjusts the mix of hot and cold automatically to hold a steady, pre-set temperature. If someone runs the dishwasher or flushes a toilet elsewhere in the house, a thermostatic system compensates instantly, so the shower temperature doesn’t spike or drop. Most thermostatic systems also separate temperature and volume into two distinct controls, giving you precise control over both.

Riobel makes a strong range of thermostatic shower systems with multi-outlet configurations for rain heads, hand showers, and body sprays.

Tenzo AirBoost: A Different Approach to Water Pressure

Tenzo takes a different angle on the shower experience with its AirBoost technology, an air-injection system built into select luxury shower heads. Rather than relying purely on water volume, AirBoost blends air into the water stream, which noticeably boosts how powerful the spray feels without increasing actual water usage. It’s a smart pairing with a thermostatic valve — you get consistent temperature control from the valve and a stronger-feeling spray from the shower head, all while keeping water consumption efficient.

How Standard Shower Systems Work

A standard shower system typically uses a single-handle pressure-balance valve, which adjusts water pressure to help limit temperature swings but doesn’t actively hold a set temperature the way a thermostatic valve does. It’s simpler mechanically, which keeps the cost down and makes it a reliable choice for single-outlet showers where multiple water sources aren’t competing for pressure.

Grohe offers a strong range of standard pressure-balance shower systems that suit most everyday bathroom setups.

Safety and Household Considerations

Thermostatic systems have a real advantage for households with young children, elderly family members, or anyone more sensitive to sudden temperature changes, since the built-in anti-scald protection prevents dangerous spikes. This is one of the more practical, not just luxury, reasons homeowners upgrade.

Complexity and Multi-Outlet Showers

If your shower design includes multiple outlets — a rain showerhead, a hand shower, and body sprays running together — a thermostatic system is generally the better fit, since it can maintain a consistent temperature even as volume demand changes across outlets. Standard systems can struggle to keep up in these multi-outlet setups.

Cost Considerations

Thermostatic valves cost more upfront due to their more complex internal mechanism, and installation can be slightly more involved. Standard shower systems remain the more budget-friendly option, particularly for simpler, single-outlet showers. Adding a Tenzo AirBoost shower head to either setup is a relatively affordable way to upgrade the feel of your shower without a full valve replacement.

Which Shower System Should You Choose?

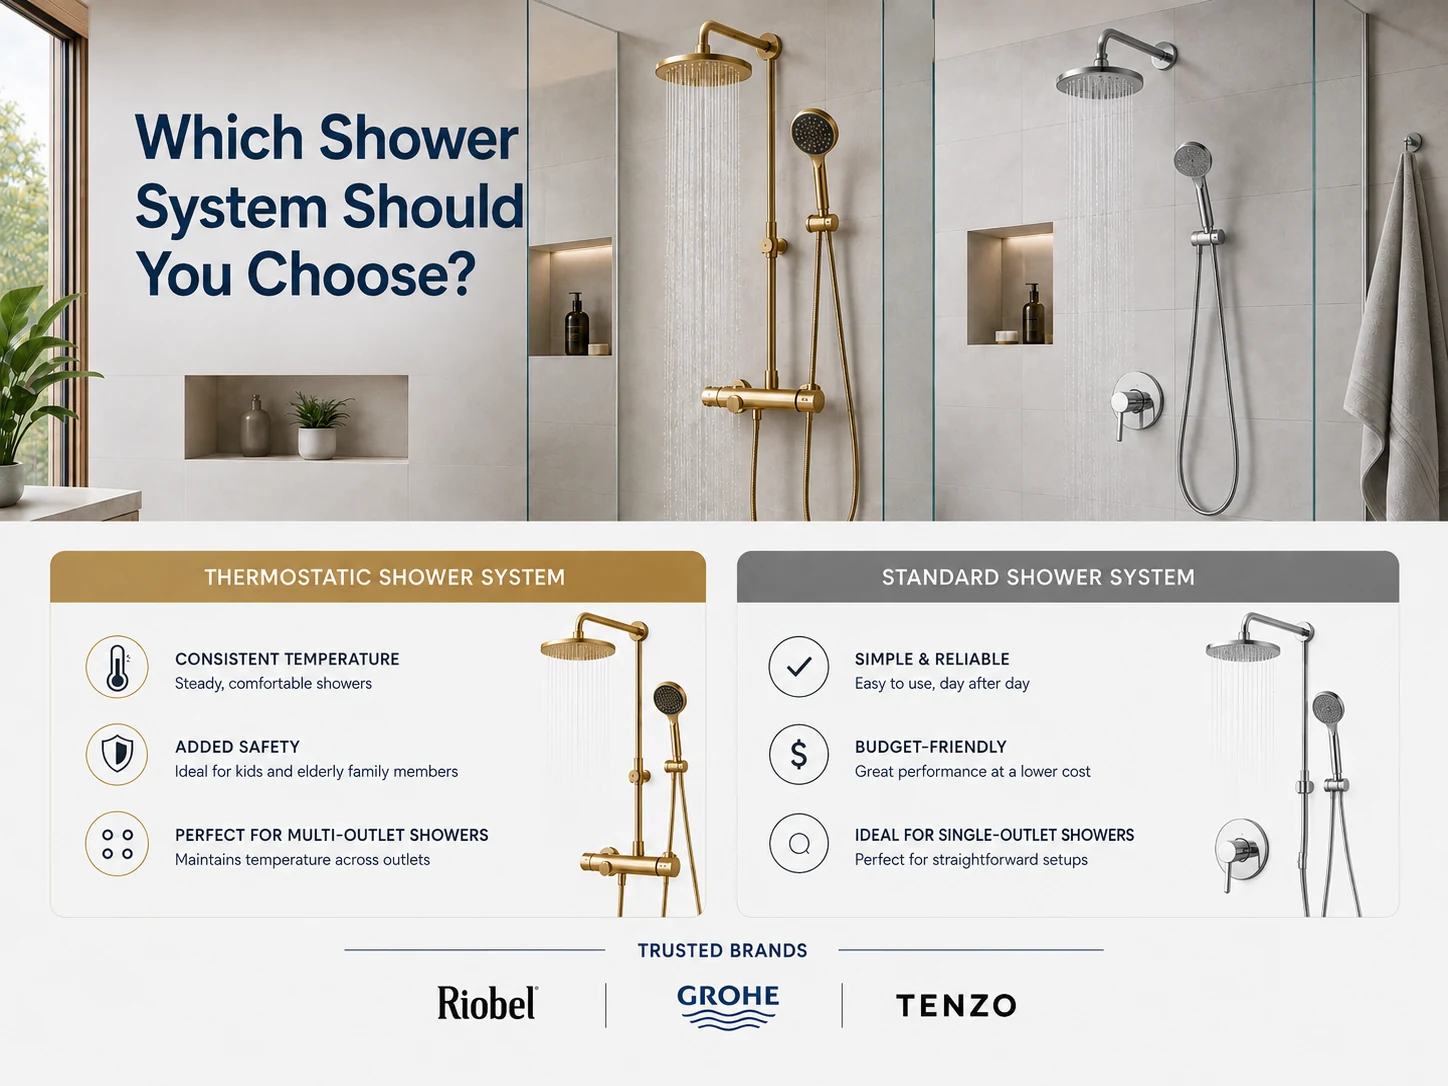
Thermostatic or Standard Shower: Which Is Right for You?

Choose a thermostatic system if you want consistent temperature control, added safety for kids or elderly household members, or you’re installing a multi-outlet shower.

Choose a standard system if you have a simple single-outlet shower and want to keep costs down without sacrificing reliable everyday performance.

Add a Tenzo AirBoost shower head to either system if a stronger-feeling spray matters to you, without increasing water use.

Final Thoughts

Both shower system types can deliver a great daily shower experience — the real question is how much you value precise, automatic temperature control versus a simpler, more affordable setup. For multi-outlet showers or households with safety concerns, thermostatic is well worth the investment; for a straightforward single-outlet shower, a standard system does the job reliably. And whichever you choose, a Tenzo AirBoost shower head is worth considering if you want a noticeably stronger spray without using more water.

Shop thermostatic and standard shower systems at Bliss Bath and Kitchen, with shipping across Canada.

Are LED Bathroom Mirrors Worth It? A Practical Buyer’s Guide

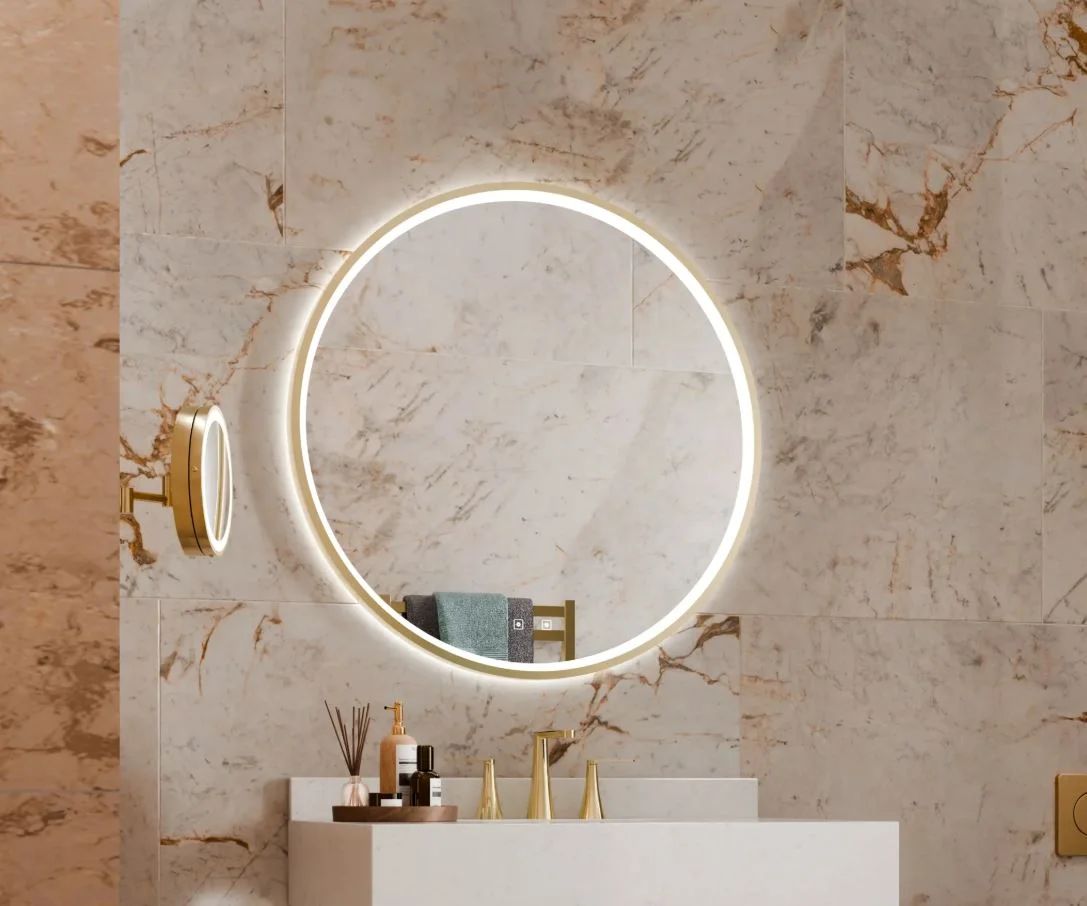
Modern LED bathroom mirror with built-in lighting and defogger

Are LED Bathroom Mirrors Really Worth It?

LED bathroom mirrors have gone from a niche upgrade to one of the most requested items in modern renovations — and for good reason. They add task lighting exactly where you need it, cut down on morning fog, and give a small or windowless bathroom a much brighter, more finished feel. But they also cost more than a standard mirror, and not every model delivers on its promises.

At Bliss Bath and Kitchen, we carry LED mirrors from trusted brands like Electric Mirror, Fleurco, ICO Canada and Madeli, so we’ve seen firsthand what separates a mirror worth the money from one that isn’t. This guide walks through what LED mirrors actually do, where they shine, where they fall short, and how to decide if one belongs in your bathroom.

LED Mirror vs. Traditional Mirror at a Glance

Feature LED Mirror Traditional Mirror
Built-in lighting Yes — front, back or edge-lit No — relies on ceiling/vanity lights
Anti-fog defogger Available on most models Not available
Dimmable / colour temperature Often adjustable (warm to cool) Not applicable
Touch or motion controls Standard on most models None
Energy use Low — LEDs last 25,000+ hours None (but overhead bulbs draw more)
Installation Requires a nearby electrical connection Simple wall mount
Typical price range $400 – $2,500+ $50 – $400

What Makes an LED Mirror Different

An LED bathroom mirror has a strip of energy-efficient LEDs built directly into the glass or frame. Depending on the design, the light can be front-facing (best for grooming and makeup), backlit (a soft halo effect that feels ambient), or edge-lit (a thin glow around the perimeter). Most models pair the lighting with practical extras: an anti-fog defogger, a dimmer, adjustable colour temperature, and touch or motion controls.

The result is a mirror that doubles as a lighting fixture — which matters more than it sounds. Bathroom lighting is notoriously bad for close-up tasks, and overhead lights cast shadows on your face. An LED mirror puts even, shadow-free light right where you’re actually looking.

The Real Benefits

Better light for grooming and makeup

This is the single biggest reason people upgrade. LED mirrors deliver bright, even light at eye level, which means no more squinting into an under-lit vanity or dragging a lamp into the bathroom. If you wear makeup, shave, or use contact lenses, the difference is immediate.

No more foggy mirrors

Most quality LED mirrors include a built-in defogger — a small heating element behind the glass that keeps the surface clear right after a hot shower. If you’ve ever tried to shave through condensation, this feature alone can justify the upgrade.

A brighter, more open-feeling bathroom

LED mirrors are especially valuable in small bathrooms, powder rooms and windowless ensuites. The extra light bounces around the space and makes it feel noticeably larger and more finished.

Energy-efficient and long-lasting

LEDs use a fraction of the energy of traditional bulbs and typically last 25,000 hours or more. Once installed, an LED mirror will likely outlast the rest of your bathroom fixtures.

A modern, high-end look

Whether it’s the sleek round halo of a Fleurco Halo Plus or the frameless Slique styling of a Madeli illuminated mirror, LED designs bring a distinctly modern feel that a standard framed mirror simply can’t match.

Electric Mirror Aurora lighted vanity mirror

The Trade-Offs to Consider

Higher upfront cost

A good LED mirror starts around $400 and premium designs can run past $2,500. That’s a real jump from a standard bathroom mirror, and something to weigh against how often you actually use the space.

Requires an electrical connection

Most LED mirrors are hardwired, so if there’s no existing outlet or wiring in the wall behind the mirror, you’ll need an electrician. It’s not a huge job, but it’s worth budgeting for.

Quality varies a lot

Cheap LED mirrors from unknown sellers can flicker, buzz, dim unevenly, or fail within a year or two. Sticking with established brands like Electric Mirror, Fleurco, ICO Canada and Madeli avoids most of these issues, and gives you a proper warranty behind the product.

Repairs can be more involved

An LED module isn’t something you swap out yourself. If a component fails after the warranty period, service is more complex than replacing a bulb.

Features Worth Paying For

Not every feature is a must-have, but a few genuinely change how the mirror feels day to day:

  • Anti-fog defogger — hands down the most useful add-on if you shower and then need to use the mirror right away.
  • Adjustable colour temperature — the ability to shift between warm white (relaxing, evening) and cool white (crisp, daytime task lighting) is a small luxury you’ll notice constantly.
  • Dimmer — helpful for late-night trips to the bathroom and for setting a softer mood.
  • Touch or motion sensor controls — cleaner-looking than a wall switch, and easier to use with wet hands.
  • Memory function — the mirror remembers your last brightness and colour setting, so you’re not adjusting it every morning.

Which LED Mirror Should You Choose?

For a designer, high-end statement piece: Electric Mirror is the go-to. Made in North America with premium build quality and a wide range of shapes, sizes and smart features, they’re a favourite in luxury bathrooms.

For the best all-around value: Fleurco‘s Halo Plus and Magna collections offer defoggers, dimming and beautiful backlit designs at a very reasonable price point — a strong pick for most renovations.

For a modern look on a tighter budget: ICO Canada makes clean, contemporary LED mirrors starting under $500, often with defoggers and touch controls included. Great for guest bathrooms and secondary ensuites.

For frameless, gallery-style designs: Madeli‘s illuminated Slique mirrors are known for their thin profile and elegant edge-lit glow — a favourite in spa-style bathrooms.

So — Are LED Bathroom Mirrors Worth It?

ICO Camden LED Bathroom Mirror

For most homeowners, yes. If you use your bathroom daily for grooming, makeup or shaving, an LED mirror delivers a noticeable everyday improvement — better light, no fog, and a more modern feel — that a traditional mirror simply can’t match. The only real caveats are budget and installation: plan for a quality brand and a proper electrical connection, and the mirror will pay you back every morning for years.

If you’re renovating anyway, adding an LED mirror is one of the easiest upgrades to justify. If your existing bathroom lighting is already excellent and the mirror is rarely used, a standard mirror may be all you need.

Final Thoughts

LED bathroom mirrors are more than a design trend — they’re a practical upgrade that solves real problems (bad light, foggy glass, dated bathrooms) with a single fixture. Choose a reputable brand, look for a defogger and adjustable lighting, and make sure the wiring is planned before installation. Do that, and you’ll wonder how you lived with a regular mirror for so long.

Shop LED bathroom mirrors at Bliss Bath and Kitchen, with shipping across Canada.

Are LED Medicine Cabinets Worth It? Costs, Benefits, and Value

Backlit LED medicine cabinet mounted above a bathroom vanity

Are LED Medicine Cabinets Worth It? The Short Answer

For most bathrooms, yes — an LED medicine cabinet is worth it. You get bright, shadow-free light exactly where you need it, plus hidden storage, all in a single fixture that replaces both a vanity light and a plain mirror. If your storage is already sorted and you only want lighting, a simple LED mirror may be enough. But if you want better light and a tidier bathroom, the cabinet earns its place.

At Bliss Bath and Kitchen, we carry LED medicine cabinets from Fleurco, ICO Canada, and Madeli — three brands known for quality glass, clean design, and lighting that actually works for grooming and makeup. Here’s an honest look at the costs, the benefits, and whether one makes sense for your bathroom.

What LED Medicine Cabinets Typically Cost

Price is usually the first thing people weigh, so it helps to know what the tiers look like before deciding whether it’s worth it. LED medicine cabinets generally fall into three ranges, and where a model lands depends on size, build quality, and features.

Entry-level

Smaller, single-door cabinets with basic integrated LED lighting sit at the lower end. You get the core benefit — a lit mirror with storage behind it — without extras like a defogger or adjustable colour temperature. These are a solid choice for powder rooms, secondary bathrooms, or a straightforward upgrade on a budget.

Mid-range

This is where most homeowners land. Mid-range cabinets add the features that make daily use noticeably better: an anti-fog defogger, adjustable warm-to-cool lighting, touch controls, and often interior outlets or USB ports. Larger single-door and some double-door models fall here, and the jump in everyday usefulness over entry-level is significant.

Premium

At the top end you’ll find larger double-door and recessed cabinets, higher-grade glass and finishes, and the fullest feature sets. Design-forward models from brands like Madeli sit in this range. For a primary ensuite or a renovation where the mirror is a focal point, the premium tier delivers a genuinely elevated result.

Whatever the tier, remember you’re consolidating a vanity light, a mirror, and a storage cabinet into one fixture — so compare the price against all three, not against a plain mirror alone. Viewed that way, the value holds up across every range.

What You’re Actually Paying For

Beyond the cabinet itself, the price reflects the integrated LED lighting built into the mirror, the electrical work to power it, and the extras — defogger, adjustable colour temperature, touch controls, and interior outlets. One fixture is doing the job of three, which is the core reason the numbers work out in its favour.

The Benefits: Where LED Medicine Cabinets Earn Their Keep

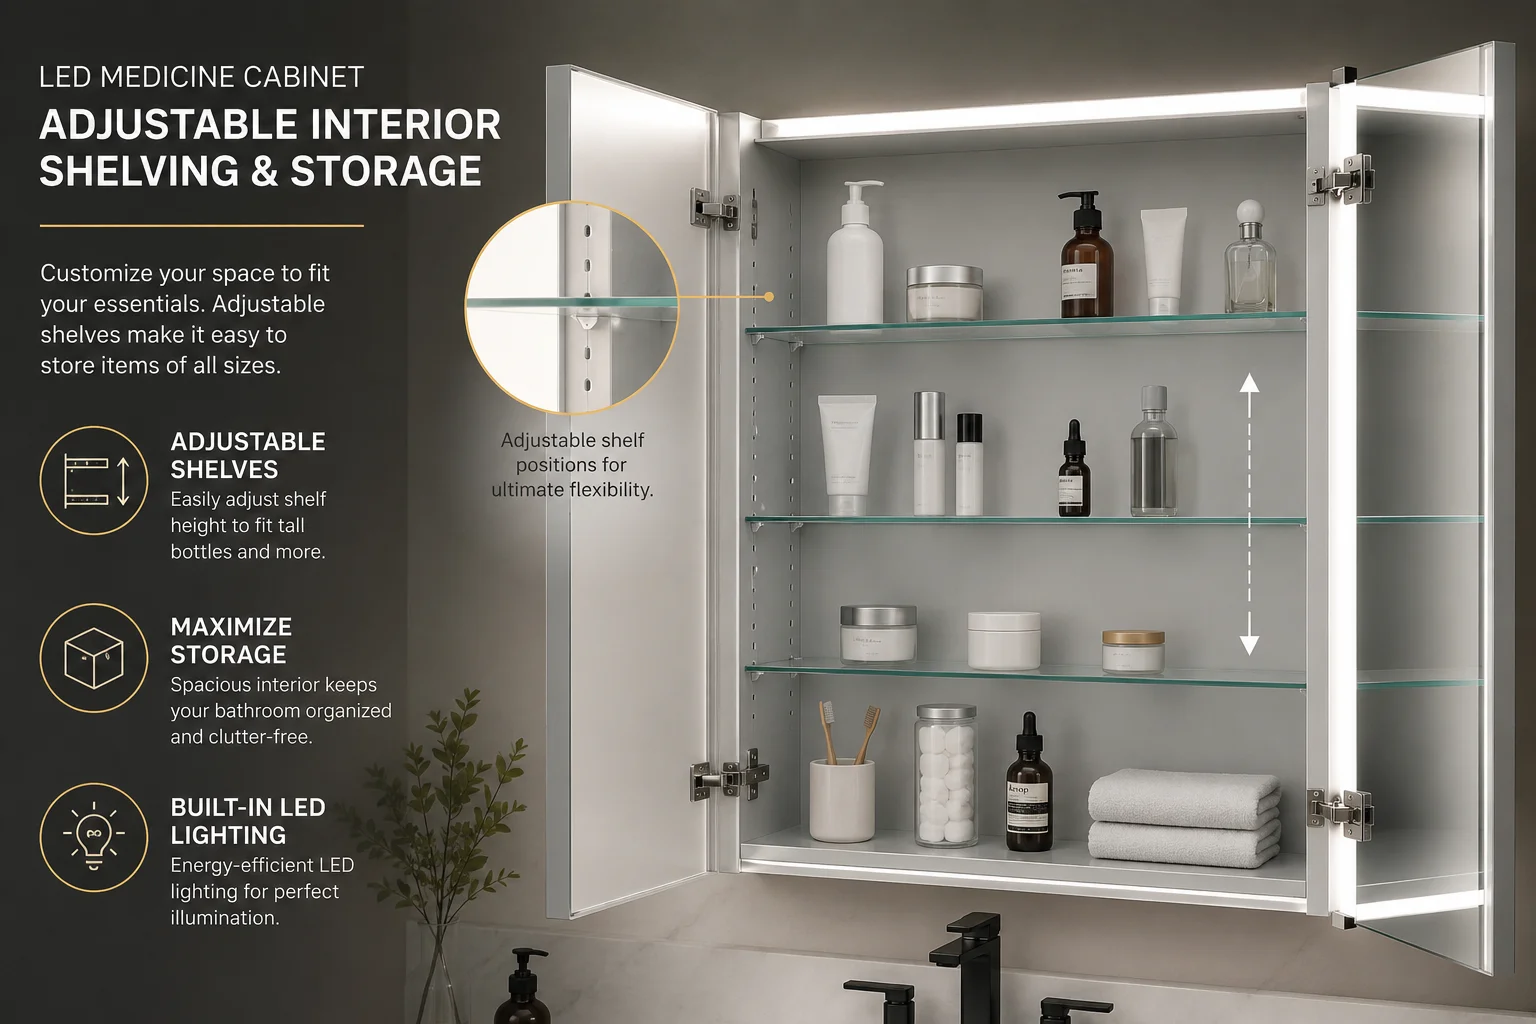
Open LED medicine cabinet showing adjustable interior shelving storage

Hidden storage in the same footprint

You reclaim your countertop by tucking medications, toiletries, and daily essentials behind the mirror — no extra wall space required. In smaller Canadian bathrooms and condos, that dual-purpose design is the whole point.

Better, more flattering light

Because the light comes from the mirror rather than a fixture over your head, it lights your face evenly and kills the harsh shadows overhead lighting creates. That’s a real, daily improvement for shaving, skincare, and applying makeup.

Features that make everyday use easier

Many models add a defogger that keeps the mirror clear after a hot shower, adjustable warm-to-cool light, touch or motion controls, and interior outlets for a toothbrush or shaver. None of these are essential, but together they’re what makes the upgrade feel worth it.

Energy-efficient and long-lasting

LED lighting uses far less energy than older bulbs and lasts for years, so you rarely think about replacing anything — you just get consistent light every day.

The Downsides to Consider

To keep this honest, an LED medicine cabinet isn’t the right call for every situation. Here are the trade-offs worth weighing before you buy.

Higher upfront cost

You’ll pay more than for a plain mirror or a basic mirror-and-cabinet combo. The value is real over time, but the initial outlay is higher, and that matters if you’re furnishing on a tight budget.

Installation usually needs an electrician

Most LED medicine cabinets are hardwired into your bathroom’s electrical, so unless there’s already a suitable connection in place, you’ll want a licensed electrician to install it. That’s an added cost and a bit of planning on top of the cabinet price.

Recessed models require cutting into the wall

If you want the flush, built-in look of a recessed cabinet, your installer has to open the wall between the studs, and the cavity has to be clear of plumbing and major wiring. That isn’t practical on every wall — particularly exterior walls — and it adds labour. Surface-mount models avoid this, but they project outward a few inches.

How Long Do LED Medicine Cabinets Last?

A quality LED medicine cabinet is built to last many years. The LED lighting itself is rated for tens of thousands of hours, and the cabinet body and glass from established brands like Fleurco, ICO Canada, and Madeli are made to hold up to daily bathroom humidity. Spread over that lifespan, the higher upfront cost works out to very little per year of use.

Is It Worth It in a Rental or Older Home?

In a rental, a hardwired, wall-cut fixture usually isn’t the right investment — you likely can’t make permanent changes, and you can’t take a recessed cabinet with you. A freestanding or over-the-door option makes more sense there.

In an older home you own, it’s often very much worth it, with one caveat: older wiring and wall construction can make installation more involved, so it’s worth having an electrician confirm what’s behind the wall before you order. A surface-mount model is frequently the easier path in an older bathroom.

LED Medicine Cabinet vs. a Regular Mirror and Cabinet

You could buy a plain mirror and a separate cabinet for less. But you’d still need a good vanity light on top, the light would come from overhead rather than the mirror, and you’d have two or three separate pieces to mount instead of one. The LED cabinet consolidates all of that and lights your face better. For most renovations, the small premium buys a noticeably nicer result.

Worth It If… / Skip It If…

It’s worth it if you want better mirror lighting for grooming or makeup, your bathroom is short on storage, your mirror fogs up after showers, or you’re already renovating and can factor in the electrical.

You can probably skip it if you’re renting, you already have plenty of storage and just want a lit mirror, or you’re working with the tightest possible budget. In those cases, a standalone LED mirror may be the smarter buy.

Final Thoughts

For the vast majority of bathrooms, an LED medicine cabinet is absolutely worth it — it improves your lighting and your storage every single day, and quality models last for years. Decide based on your wall, your budget, and your storage needs, then pick the features that matter most to you, whether that’s a defogger, adjustable light, or built-in charging.

Shop LED medicine cabinets from Fleurco, ICO Canada, and Madeli at Bliss Bath and Kitchen, with shipping across Canada.

0
0
Your Cart
Your cart is emptyReturn to Shop